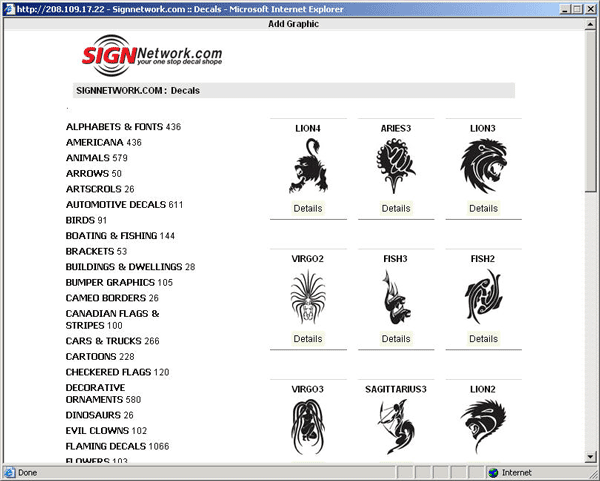
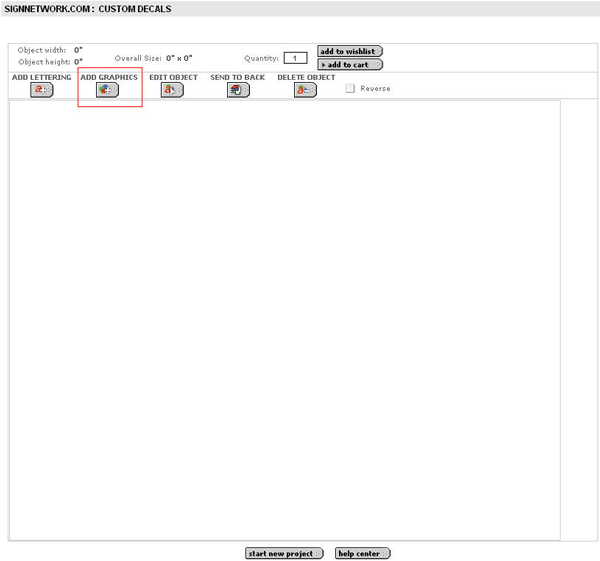
Add Graphics:
Click the Add Graphics button to choose the decal you would like to customize.
In the Pop up window navigate to the decal of your choice by clicking on the categories. When you find the decal you are looking for click on it in order to customize.
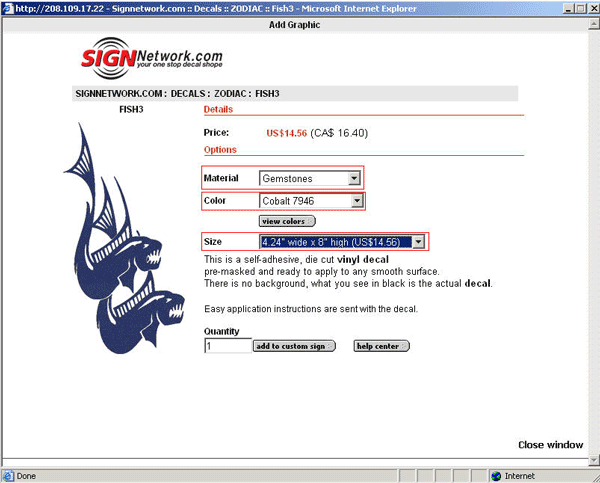
In the next screen, select the material, color and size of your decal from the drop down lists. If you don't find the exact size you need - choose the closest measurements available, you will be able to adjust the size later.
When you are satisfied with the result click Add to custom sign to add the decal to the work area.
Add Lettering:
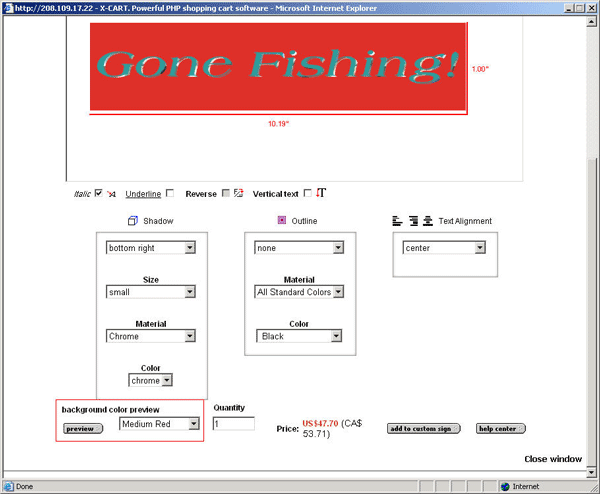
Click the Add Lettering button to add your own text
In the Pop up window enter your text, assign size, choose material and color. Select the font from the drop down list or click the View fonts button to preview and apply the desired font. Apply text effects, such as Italic,
Underline, Shadow or Outline in different sizes and colors or make your text Vertical. If your text contains multiple lines use Text Alignment to center the lines.
You can preview the decal against a color that best matches your background in order to visualize how the final product might look.
NOTE: Background color is for preview ONLY. The final product is a die cut decal with no background.
When you are satisfied with the result click Add to custom sign to add the text to the work area.
Repeat the above steps for each graphic or text object you want to add.
If you decide to restart your project at any time click the Start new project button - and begin anew.
Finalize your Custom Sign
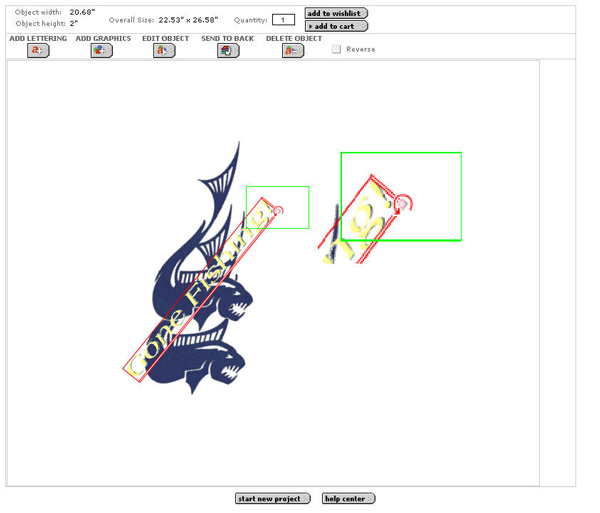
Once all items are in the work area you can position, resize, and change the angle of the items to produce your final creation.
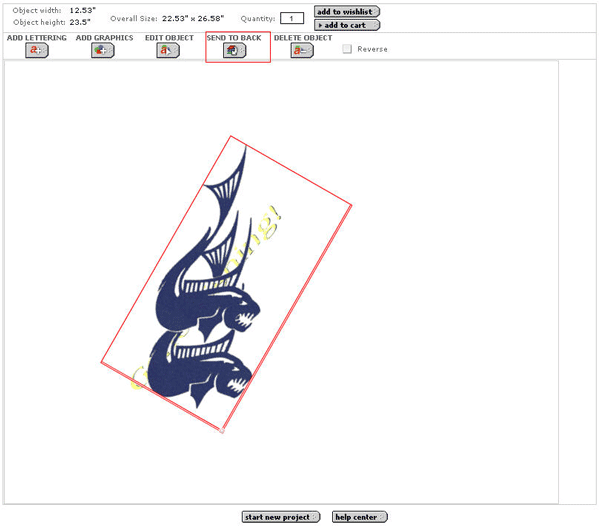
In order to work with any of the elements in your custom sign click on the desired item - a red box will be drawn around it to indicate it is active.
The height and width of the selected object is indicated in the top left corner.
Overall size represents the size of the
entire decal - including all the elements. In this example it is represented by the green line.
You can further Edit objects individually, Send to back or Delete.
Edit Object:
Click on the item you need to edit, a red box will be drawn around it to indicate it is active.
Click the Edit Object button - the appropriate pop up window will open automatically to allow you to edit the item. Simply make your changes and click Update to return to the work area.
To move the object on the canvas simply click on the item you need to edit, a red box will be drawn around it to indicate it is active.
Drag the object with your mouse and release when you are satisfied with the result.
To resize the object with your mouse, simply click on the item you need to edit, a red box will be drawn around it to indicate it is active.
Hover the mouse over the bottom right corner until the jumping arrows appear.
Click and drag the corner with your mouse to resize the object proportionally.
Note that the object's width and height are displayed in the top left corner of the work area.
To change the height only hover the mouse over the bottom red line until the jumping arrow appears.
Click and drag the line with your mouse until the desired height is achieved.
Note that the object's height is displayed in the top left corner of the work area.
To change the width only hover the mouse over the right side red line until the jumping arrow appears.
Click and drag the line with your mouse until the desired width is achieved.
Note that the object's width is displayed in the top left corner of the work area.
To rotate the object with your mouse, simply click on the item you need to edit, a red box will be drawn around it to indicate it is active.
Hover the mouse over the bottom right corner until a knob with a circular arrow appears.
Rotate the item by then knob with your mouse until the desired angle is achieved.
Send to Back:
Use Send to Back to order the items in your custom sign.
For example, you many want to have your text on top of your graphics. You need to send the decal that is now on top to the back so the text will be in on top.
Click on the item you need to send to the back, a red box will be drawn around it to indicate it is active.
Click the Send to Back button - the selected item is now on the ottom.
Delete Object:
Use the Delete Object button to delete any item in your custom sign.
Click on the item you need to delete, a red box will be drawn around it to indicate it is active.
Click the Delete Object button - the item will be removed from the work area.
When you are satisfied with your Creation click Add to cart button.